Gather Your Ingredients and Tools
Crafting artisanal soap bars is a fun and rewarding activity that allows you to create personalized suds that are perfect for your skin. The first step in making Homemade soap is gathering all the necessary ingredients and tools. Here’s a guide on what you’ll need to get started on your soap-making journey.
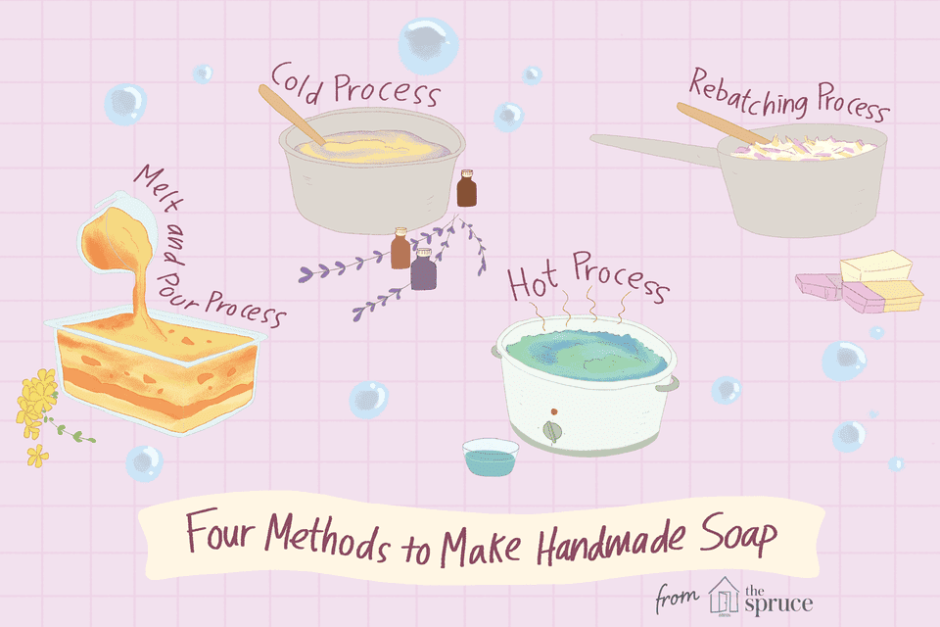
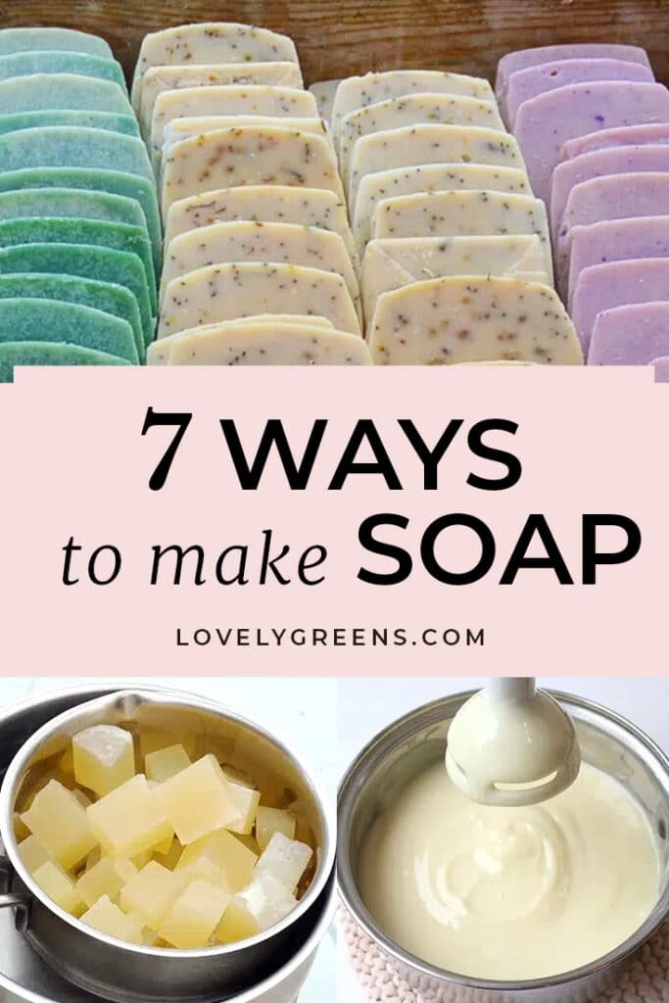
Image Source: thesprucecrafts.com
First and foremost, you’ll need a good quality soap base. This can be in the form of melt-and-pour soap base, which is perfect for beginners as it eliminates the need for handling lye. Alternatively, you can opt for cold process soap making, which involves using lye to create soap from scratch. Whichever method you choose, make sure to select a soap base that is gentle on the skin and free of harsh chemicals.
Next, you’ll need a variety of oils and butters to add moisture and nourishment to your soap bars. Some popular choices include coconut oil, olive oil, shea butter, and cocoa butter. These ingredients not only contribute to the soap’s texture and lather but also provide numerous benefits for the skin.
Image Source: lovelygreens.com
In addition to oils and butters, you’ll also need essential oils or fragrance oils to add scent to your soap bars. Essential oils are natural extracts derived from plants and flowers, while fragrance oils are synthetic scents. Whichever you choose, make sure to select high-quality oils that are safe for use on the skin.
Colorants are another essential ingredient for adding visual appeal to your soap bars. You can use natural colorants such as clays, herbs, and spices, or opt for cosmetic-grade micas and pigments for vibrant hues. Experiment with different color combinations to create unique and eye-catching designs.
Image Source: rvohealth.io
To create a luxurious lather and add exfoliating properties to your soap bars, consider adding ingredients such as oatmeal, coffee grounds, or dried botanicals. These additives not only enhance the texture of the soap but also provide additional benefits for the skin.
Now that you have gathered all the necessary ingredients, it’s time to gather the tools needed for soap making. Some essential tools include a heat-safe container for melting the soap base, a digital scale for measuring ingredients accurately, a thermometer for monitoring temperatures, and a silicone mold for shaping the soap bars.
You’ll also need mixing tools such as a whisk or spatula for combining ingredients, as well as molds, cutters, and stamps for creating unique shapes and designs. Additionally, be sure to have safety equipment such as gloves, goggles, and a long-sleeved shirt to protect yourself when handling lye.
With your ingredients and tools in hand, you’re ready to embark on your soap-making adventure. Get creative, experiment with different scent and color combinations, and most importantly, have fun crafting your very own artisanal soap bars. Your skin will thank you for it!
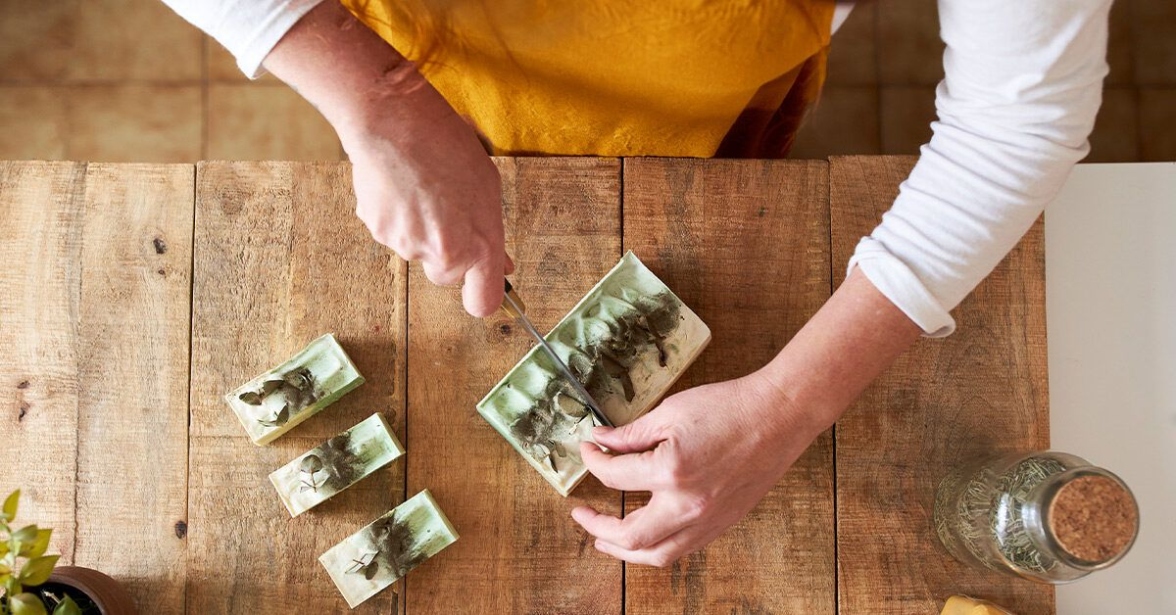
Mix, Mold, and Design Your Soap
Now that you have gathered all your ingredients and tools, it’s time to get creative and start mixing, molding, and designing your soap bars. This step is where you can truly let your artistic side shine and create beautiful, one-of-a-kind soap creations that not only smell amazing but also look stunning.
The first step in this process is to carefully measure out all of your ingredients according to your chosen Recipes-ideas/’>Recipe. Once you have everything measured out, it’s time to start mixing. Whether you are using a cold process, hot process, or melt and pour method, the key is to mix your ingredients thoroughly to ensure that they are evenly combined.
As you mix your soap base with your chosen scents and additives, you can start to think about how you want your soap bars to look. Will you add swirls of color for a marbled effect? Or perhaps you want to layer different colors for a stunning visual impact. The possibilities are endless, so don’t be afraid to experiment and try new techniques.
Once your soap mixture is fully mixed and ready to go, it’s time to pour it into your molds. Whether you are using silicone molds, wooden molds, or even repurposed containers, make sure to pour your soap mixture carefully to avoid air bubbles and ensure a smooth finish. You can also tap your molds gently on the counter to release any trapped air and help your soap bars set evenly.
After you have poured your soap into the molds, it’s time to let your creativity shine as you design the tops of your soap bars. You can sprinkle dried flowers, herbs, or even glitter on top for a decorative touch. You can also use tools like a skewer or toothpick to create swirls, patterns, or even write messages on the surface of your soap bars.
Once you are satisfied with the design of your soap bars, it’s time to let them set and cure. This is an important step in the soap-making process, as it allows the soap to harden and fully develop its lather and scent. Depending on the recipe you are using, the curing time can vary from a few days to several weeks.
During this time, it’s important to store your soap bars in a cool, dry place away from direct sunlight and humidity. You can cover them with a clean towel or cloth to protect them from dust and debris while they cure. It’s also a good idea to check on your soap bars periodically to make sure they are setting properly and do not need any adjustments.
As your soap bars cure and set, you can start to plan how you will package and present them. You can wrap them in decorative paper, tie them with ribbon, or even create custom labels for a professional touch. Whether you are making soap bars for yourself, friends, or to sell, presentation is key to making your creations truly stand out.
Once your soap bars have fully cured and set, it’s time to enjoy the fruits of your labor. You can take a relaxing bath with your handmade creations, gift them to loved ones, or even start your own soap-making business. The possibilities are endless when it comes to crafting artisanal soap bars, so don’t be afraid to let your creativity run wild and see where it takes you.
Let Your Soap Cure and Set
Once you have mixed, molded, and designed your artisanal soap bars, the next step in the process is to let them cure and set. This crucial step not only helps your soap bars harden and become long-lasting, but it also allows the soap to completely finish the saponification process, resulting in a gentle and luxurious lather.
Curing your soap bars is a simple yet important process that requires patience and attention to detail. Here are some tips and tricks to help you successfully cure and set your Homemade soap creations.
1. Patience is Key: It is important to remember that the curing process takes time. Most soap bars need to cure for at least 4-6 weeks before they are ready to be used. During this time, the soap will harden, the excess water will evaporate, and the pH levels will stabilize. The longer you let your soap cure, the milder and longer-lasting it will become.
2. Proper Storage: While your soap is curing, it is essential to store it in a cool, dry place away from direct sunlight and humidity. You can use a drying rack or a well-ventilated area to allow air circulation around the soap bars. Avoid stacking the soap bars on top of each other, as this can prevent them from properly curing.
3. Check for Hardness: To determine if your soap bars are ready to be used, gently press on them with your finger. If the soap feels firm and doesn’t leave an indentation, it is likely ready to be used. If the soap is still soft and pliable, continue to let it cure for a few more days before checking again.
4. Test for pH Levels: Another way to ensure that your soap bars are fully cured is to test the pH levels. You can use pH strips or a pH meter to check the acidity of the soap. A properly cured soap will have a pH level of around 9-10, which is gentle and suitable for the skin.
5. Enjoy the Transformation: As your soap bars cure and set, you will notice a transformation in their appearance and texture. The colors may deepen, the scent may intensify, and the texture may become smoother. This is a sign that your soap is maturing and becoming a truly artisanal creation.
6. Experiment with Different Curing Times: While most soap Recipes-ideas/’>Recipes recommend curing for 4-6 weeks, you can experiment with different curing times to achieve different results. Some soap makers prefer to let their soap bars cure for longer periods, up to 8-12 weeks, to create a harder and longer-lasting bar.
7. Keep a Soap Journal: To track your curing process and note any changes or observations, consider keeping a soap journal. Record the date you made the soap, the ingredients used, the curing time, and any other relevant information. This will help you learn from each batch of soap and improve your soap-making skills.
Overall, the curing and setting process is a crucial step in crafting artisanal soap bars. By allowing your soap to cure properly, you can create luxurious and high-quality creations that will delight your senses and nourish your skin. So, embrace the art of soap making and enjoy the journey of creating your own Homemade suds.
4. Enjoy Your Luxurious Artisanal Creations!
Now that you have put in the time, effort, and creativity to craft your own artisanal soap bars, it’s time to sit back, relax, and enjoy the fruits of your labor. There is nothing quite like the feeling of using a soap bar that you have made with your own hands. Not only are these bars gentle on your skin, but they also make a lovely addition to your bathroom or kitchen.
As you lather up with your Homemade soap, take a moment to appreciate the scents and textures that you have carefully selected and blended together. The rich lather and moisturizing properties of your artisanal creations will leave your skin feeling clean, soft, and pampered. Whether you prefer a refreshing citrus scent, a calming lavender aroma, or a invigorating minty fragrance, you can customize your soap bars to suit your own personal preferences.
One of the joys of crafting artisanal soap bars is being able to share them with friends and family. These handmade creations make wonderful gifts for birthdays, holidays, or special occasions. Wrap them up in pretty paper or fabric, tie them with a ribbon, and voila! You have a thoughtful and unique present that is sure to be appreciated by your loved ones.
In addition to using your artisanal soap bars for personal use and gifting, you can also consider selling them at local markets, fairs, or online. People are increasingly seeking out natural and handmade products, and your soap bars are sure to be a hit with eco-conscious consumers. With a little marketing and promotion, you may find that your hobby of soap making can turn into a profitable small business venture.
Another way to enjoy your luxurious artisanal creations is by hosting soap making workshops or parties. Invite your friends, family, or neighbors over for a fun and interactive experience of crafting soap bars together. Share your knowledge, tips, and tricks with others who are interested in learning the art of soap making. Not only will you have a great time socializing and being creative, but you will also inspire and empower others to explore their own creativity.
As you continue to make and enjoy your artisanal soap bars, consider experimenting with new ingredients, techniques, and designs. The possibilities are endless when it comes to soap making, and there is always something new to learn and try. Whether you want to create a silky smooth bar with shea butter and oatmeal, or a colorful and whimsical bar with swirls and embeds, let your imagination run wild and see where it takes you.
In conclusion, crafting artisanal soap bars is a rewarding and fulfilling hobby that allows you to express your creativity, pamper your skin, and share your creations with others. So go ahead, gather your ingredients and tools, mix, mold, and design your soap, let it cure and set, and finally, enjoy your luxurious artisanal creations! The world of handmade soap making is waiting for you to explore and discover, so dive in and have fun creating your very own Homemade sudsy masterpieces.
how to make homemade soap bars


