Sparkling Snow Globes: Handmade Winter Magic
Winter is a magical time of year, filled with snowflakes, hot cocoa, and cozy nights by the fire. And what better way to capture the whimsy of the season than by crafting your own snow globes? These sparkling creations are a fun and festive way to bring a little bit of winter magic into your Home.
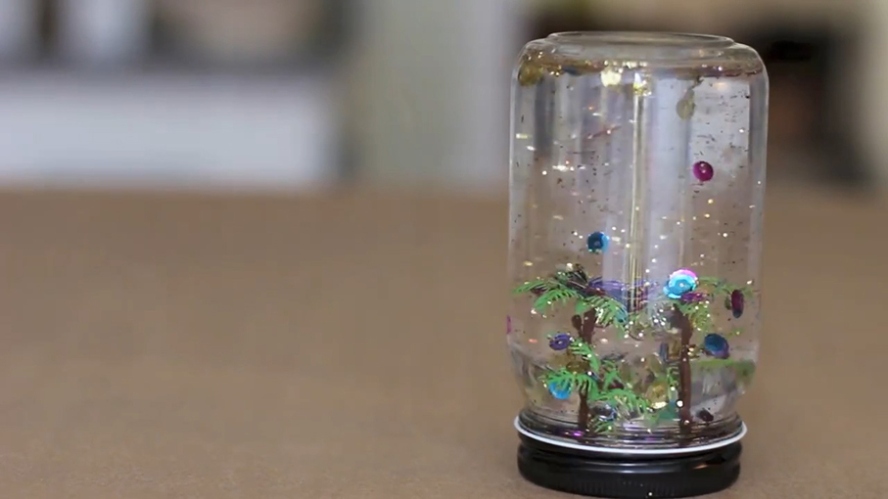
Image Source: pbskids.org
Creating your own snow globes is a surprisingly simple DIY project that can be customized to fit any theme or style. Whether you want to make a traditional snow globe with a snow-covered scene or something a little more whimsical like a snow globe filled with glitter and sparkles, the possibilities are endless.
To start your snow globe-making adventure, you’ll need a few basic supplies. A clear glass jar or container, some distilled water, glycerin (to make the snowflakes fall more slowly), glitter, small figurines or Decorations, and waterproof glue are all you need to get started. Once you have your supplies gathered, the real fun can begin.
One of the best parts of making your own snow globes is getting to choose what goes inside. You can create a winter wonderland scene with tiny trees, snowmen, and sleds, or go for something a little more whimsical like unicorns, fairies, or even dinosaurs. The only limit is your imagination!
After you’ve chosen your figurines and decorations, it’s time to assemble your snow globe. Start by securely gluing your figurines to the inside of the lid of your jar. Once the glue has dried, fill the jar with distilled water, leaving a little bit of space at the top. Add a few drops of glycerin and as much glitter as you like, then carefully screw the lid onto the jar. Give your snow globe a shake, and watch as the glitter falls like snowflakes around your scene.
Once you’ve mastered the art of making traditional snow globes, you can start experimenting with different styles and techniques. Try using different colored glitter, adding small LED lights to make your snow globe sparkle, or even incorporating music boxes into your creations for an extra festive touch.
No matter how you choose to decorate your snow globes, one thing is for sure – they are sure to bring a touch of winter magic to your home. Whether you display them on a mantel, use them as centerpieces for a winter party, or give them as gifts to friends and family, handmade snow globes are a fun and creative way to celebrate the season.
So why not gather your supplies, put on some holiday music, and get crafting? With a little bit of glitter, some tiny figurines, and a whole lot of imagination, you can create your own sparkling snow globes that will bring a touch of winter magic to your home. Happy crafting!
Crafting Whimsy: DIY Snow Globes Galore
Winter is a magical time of year, filled with snowflakes, hot cocoa, and cozy nights by the fire. One way to add a touch of whimsy to your winter wonderland is by crafting your own DIY snow globes. These charming creations are not only fun to make, but they also make beautiful Decorations for your Home or gifts for loved ones. Whether you’re a seasoned crafter or a beginner looking for a new project, DIY snow globes are the perfect way to bring a bit of sparkle to your winter season.
The first step in creating your own snow globe is to gather your materials. You’ll need a glass jar or container with a tight-fitting lid, distilled water, glycerin, glitter, small figurines or decorations, and waterproof glue. The possibilities are endless when it comes to choosing what to put inside your snow globe. You could use miniature trees, animals, or even tiny houses to create your own winter wonderland scene. Let your imagination run wild and choose decorations that speak to you.
Once you have your materials gathered, it’s time to start assembling your snow globe. Begin by securely gluing your chosen figurines or decorations to the inside of the lid of your jar. Make sure to use waterproof glue to prevent any leaks. Once the glue has dried, fill the jar with distilled water, leaving a bit of space at the top to allow for the displacement of the figurines. Add a few drops of glycerin to the water – this will help the glitter to fall slowly when you shake the snow globe.
Now comes the fun part – adding the glitter! Sprinkle a generous amount of glitter into the water-filled jar. You can use different colors and sizes of glitter to create a magical effect. Once you’re happy with the amount of glitter, carefully screw the lid onto the jar, making sure it’s on tight to prevent any leaks. Give your snow globe a good shake and watch as the glitter swirls around your winter scene, creating a sparkling snowstorm.
DIY snow globes make wonderful decorations for your home during the winter months. Place them on your mantle, coffee table, or bookshelf to add a touch of whimsy to any room. They also make thoughtful gifts for friends and family. Personalize each snow globe with decorations that reflect the recipient’s interests or hobbies – they’re sure to appreciate the thought and effort you put into creating a handmade gift just for them.
Crafting your own snow globes is a fun and creative way to add a bit of magic to your winter season. Whether you’re making them for yourself or as gifts, these whimsical creations are sure to bring a smile to anyone’s face. So grab your materials, put on your favorite holiday music, and get crafting – you’ll be amazed at the beautiful snow globes you can create with just a few simple ingredients and a whole lot of imagination.
Festive DIY: Create Your Own Snow Globe Scene
Winter is a magical time of year, filled with snowflakes, hot cocoa, and cozy nights by the fire. One way to bring a touch of that magic into your Home is by creating your own snow globe scene. This festive DIY project is a fun and easy way to embrace the whimsy of the season and add a touch of Homemade charm to your decor.
To create your own snow globe scene, you’ll need a few simple supplies. Start with a clean glass jar with a tight-fitting lid. You can use any size jar you like, depending on the size of the scene you want to create. Next, gather some faux snow or glitter, small figurines or miniatures, and a waterproof adhesive. You can find all of these supplies at your local craft store or online.
Once you have your supplies gathered, it’s time to start assembling your snow globe scene. Begin by securely attaching your figurines or miniatures to the inside of the jar lid using the waterproof adhesive. You can create a winter wonderland with snowmen, trees, and animals, or get creative and make a scene that reflects your own personal style.
Next, add a sprinkle of faux snow or glitter to the bottom of the jar. This will create the snowy base for your scene and give it that magical winter touch. Be sure to use enough snow to cover the bottom of the jar, but not so much that it obscures your figurines.
Once you have your figurines attached and your snow in place, carefully fill the jar with water, leaving a little bit of space at the top. You can also add a drop of glycerin to the water to help slow down the movement of the snow and create a more realistic snow globe effect.
Finally, carefully screw the lid onto the jar, making sure it is on securely. Give your snow globe a shake and watch as the snow swirls around your scene, creating a winter wonderland right in your own home.
Creating your own snow globe scene is a wonderful way to add a touch of homemade charm to your winter decor. Whether you choose to make a traditional snowman scene or a whimsical woodland setting, your DIY snow globe is sure to bring a smile to your face and warm your heart on even the coldest winter days.
So why not gather your supplies, put on some festive music, and get crafting? With just a few simple steps, you can create your own snow globe scene and bring a little touch of winter magic into your home. Who knows, you may even start a new holiday tradition that you’ll cherish for years to come.
Winter Wonderland: Homemade Snow Globe Fun
Welcome to a whimsical world of DIY crafting, where we will explore the enchanting art of making Homemade snow globes for a winter wonderland. Snow globes are a delightful way to capture the magic of the season, and creating your own personalized snow globe is a fun and satisfying project that will bring joy to your home.
There is something truly magical about shaking a snow globe and watching the glittering snow swirl around a miniature winter scene. With just a few simple materials and a dash of creativity, you can bring this enchanting experience to life in your own home. Whether you are a seasoned crafter or a beginner looking to try something new, making homemade snow globes is a delightful way to infuse your space with a touch of winter whimsy.
To get started on your snow globe adventure, all you need is a clear glass jar or container, distilled water, glycerin (to make the snow fall slowly), glitter, and a few small figurines or Decorations to create your winter scene. You can find these materials at your local craft store or simply repurpose items you already have at home. The beauty of DIY snow globes is that you can customize them to your heart’s content, adding your own personal touch to each creation.
Once you have gathered your materials, the fun part begins – assembling your snow globe scene! You can choose to create a traditional winter wonderland with snow-covered trees and tiny houses, or let your imagination run wild with whimsical characters and fantastical landscapes. The possibilities are endless, and the only limit is your creativity.
As you carefully place your figurines and decorations inside the jar, take a moment to imagine the magical world you are creating. Perhaps it is a snowy forest inhabited by woodland creatures, or a charming village bustling with holiday cheer. Whatever scene you envision, let your imagination guide you as you bring it to life within the confines of your snow globe.
Once your scene is set, it is time to add the finishing touches that will make your snow globe sparkle and shine. Sprinkle a generous amount of glitter into the jar, allowing it to fall gently onto your winter scene like a flurry of snowflakes. The glitter will catch the light and create a mesmerizing effect as you shake your snow globe, transporting you to a magical winter wonderland.
After adding the glitter, carefully fill the jar with distilled water, leaving a small space at the top to allow for movement when you shake the snow globe. A few drops of glycerin will help the snow fall slowly, creating a more realistic snow globe effect. Seal the jar tightly, making sure that it is secure to prevent any leaks.
And there you have it – your very own homemade snow globe, ready to enchant and delight all who behold it. Whether you display it on a shelf, give it as a thoughtful gift, or simply enjoy the whimsical wonder of your creation, your snow globe is sure to bring a touch of magic to your winter décor.
So why not gather your materials, unleash your creativity, and embark on a DIY snow globe adventure? With a sprinkle of glitter and a dash of imagination, you can create a winter wonderland that is uniquely yours. Let the magic of homemade snow globes transport you to a world of whimsy and wonder, where anything is possible and the season is filled with joy.
how to make homemade snow globes


